Las Vegas Motorcoach Service"


RV Repair

RV Repair Services

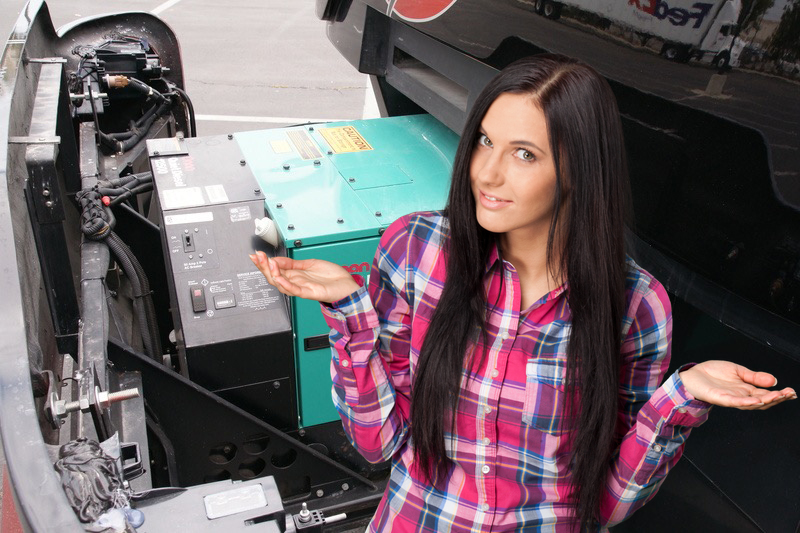
RV Generator Repair

- comments

enter image description here

GENERATOR SERVICE – FROM $149.00

Price may vary due to parts needed or replacements

Check and clean battery connections
Visual inspection of exhaust system
Verify CO detector operations and working properly
Check air & fuel filter (replace if necessary for additional charge)
Change oil & filter, perform load test.

RV Generator Repair | RV Generator Service | Motorhome Generator Repair

**24/7 MotorCoach Service Center**
3930 W. Windmill Lane #130-B
Las Vegas Nevada 89139
*702-757-2471*

enter image description here Looking to Sell or Upgrade Your RV?

Whether you don’t have the time for maintenance or the need for your RV anymore, or even if you’re a seasoned traveler looking to sell for something new, We can help you out. Selling a used vehicle of any kind can be a real hassle so we're to help with our Platinum 24/7 Consignment Sales Program.

Platinum 24/7 Consignment Sales Program

Preparations for sale of R.V: Owner of Vehicle (“Owner”) here by authorizes 24/7 to stage Owners vehicle, this will include:

  1. Full monthly exterior detail of vehicle.
  2. 165 point certified safety and repair inspection.
  3. Stage vehicle on 24/7 showroom floor, (the area is 50% larger indoor storage space)
  4. Up to 50 Professional Photos of the vehicle.
  5. Full video of the vehicle.
  6. Marketing to 24/7 customer data base and storage customers.
  7. Marketing on 24/7 website.
  8. Marketing the vehicle on multiple media outlets.
  9. 24/7 Platinum Sales Program marketing on online advertising sites.
  10. Professional analysis of value including NADA, and comparable resales.
  11. Consultation of all offers and guidance of all sale contracts.
  12. Consultation with Buyer on all financing options.
  13. Buyer and Seller coordination through the sales process.

Platinum-listing package will include 165 point inspection, monthly detailing, upfront cost of marketing the Vehicle and monthly oversized showroom indoor storage. 24/7 will complete a 165 point inspection of all recommended repairs to prepare the vehicle for sale and to increase the value of the vehicle. Vehicles in excellent condition will sell in a shorter amount of time and provide generally a higher sales price. 24/7 prides ourselves in selling high quality resale vehicles and will require all safety repairs to be completed in order to become a Certified Pre-Owned Vehicle. 24/7 will present these repairs to the owner, and upon agreement, will repair the vehicle. Repairs are to be paid at time of completion. Owner and 24/7 agrees to communicate every 30 days to review and adjust sales price as needed. 24/7 will provide an updated sales comparable listing sheet to show market conditions. If 24/7 and the Owner cannot agree on a list price and sales price, then 24/7 cannot list the vehicle under the Platinum Listing Agreement.

702-996-8477 | 24-7MotorCoachLuxurySales.com

24/7 MotorCoach Luxury Sales 3930 W. Windmill Lane Suite130 Las Vegas NV 89139

RV Roof Repair

- comments

enter image description here Common Signs of RV Roof Damage

RV roof damage can take many different forms. It doesn’t matter if you’re a full-time RVer or go out once every season, your RVs roof can be damaged no matter where you go. Some common signs of RV Roof Damage to look out for include:

  • Sagging
  • Leaking
  • Cracks
  • Delamination
  • Rust
  • Aging
  • Dents
  • Scratches

Some of the RV roof damage such as sagging, leaking, and rust can be the result of water damage. Water can easily get into your RV and cause a lot of problems in a short amount of time.

Let the pro's at 24/7 MotorCoach Service handle all your RV Roof issues as we can provide every type of maintenance service from repairing to rebuiliding and replacing, we have you covered!

Here are some of our most common RV Roof Repair Services:

Scrub Roof Surface and Sealants https://24-7motorcoachservicecenter.com/las-vegas-rv-motorcoach-scrub-roof-surface-and-sealants.php

Reseal Roof https://24-7motorcoachservicecenter.com/las-vegas-rv-motorcoach-reseal-roof-repair.php

Spot Seal Roof https://24-7motorcoachservicecenter.com/las-vegas-rv-spot-seal-roof-repair.php

24/7 MotorCoach Service Center 3930 W. Windmill Lane #130-B Las Vegas Nevada 89139

702-757-2471

Reseal RV Body Seals

- comments

enter image description here Best RV Sealants for Maintaining Your RV

Routinely maintaining your RV is the best way to keep your coach looking and operating properly. While RV are made to last and act as a second home, they will usually require extensive amounts of work throughout the years. It would be nice if they were built similarly to the exteriors of waterproofed busses, but that would make RVs much more expensive. RV sealants, however, are a great way to waterproof and seal the exterior of your coach. Below are some of our favorite RV sealants.

  • Geocel 28100V ProFlex RV
  • Dicor 501LSW-1 Lap Sealant
  • Tremco Vulkem 116
  • ToughGrade
  • Sashco

These are our top 5 choices for RV sealants. We want to make sure you’re getting the best RV products out there to keep your coach in as best shape as possible.

We Reseal RV Body Seals From $750 PRICE SUBJECT TO INSPECTION

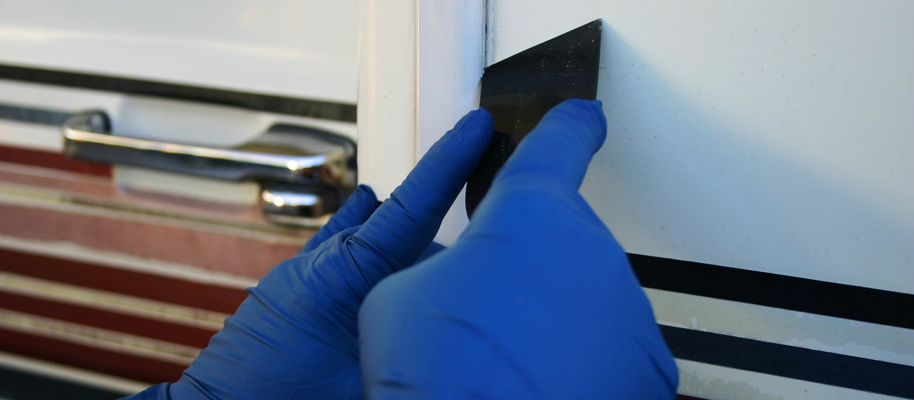
Trim and scrape off all exterior body joints and seams, compartment doors, windows, exterior lights and all components where there is a hole or penetration through the exterior body where old silicon or puttytape has bled out, cracked or separated

Prep area for re-sealing in white, clear or almond sealant to all accessible areas listed above

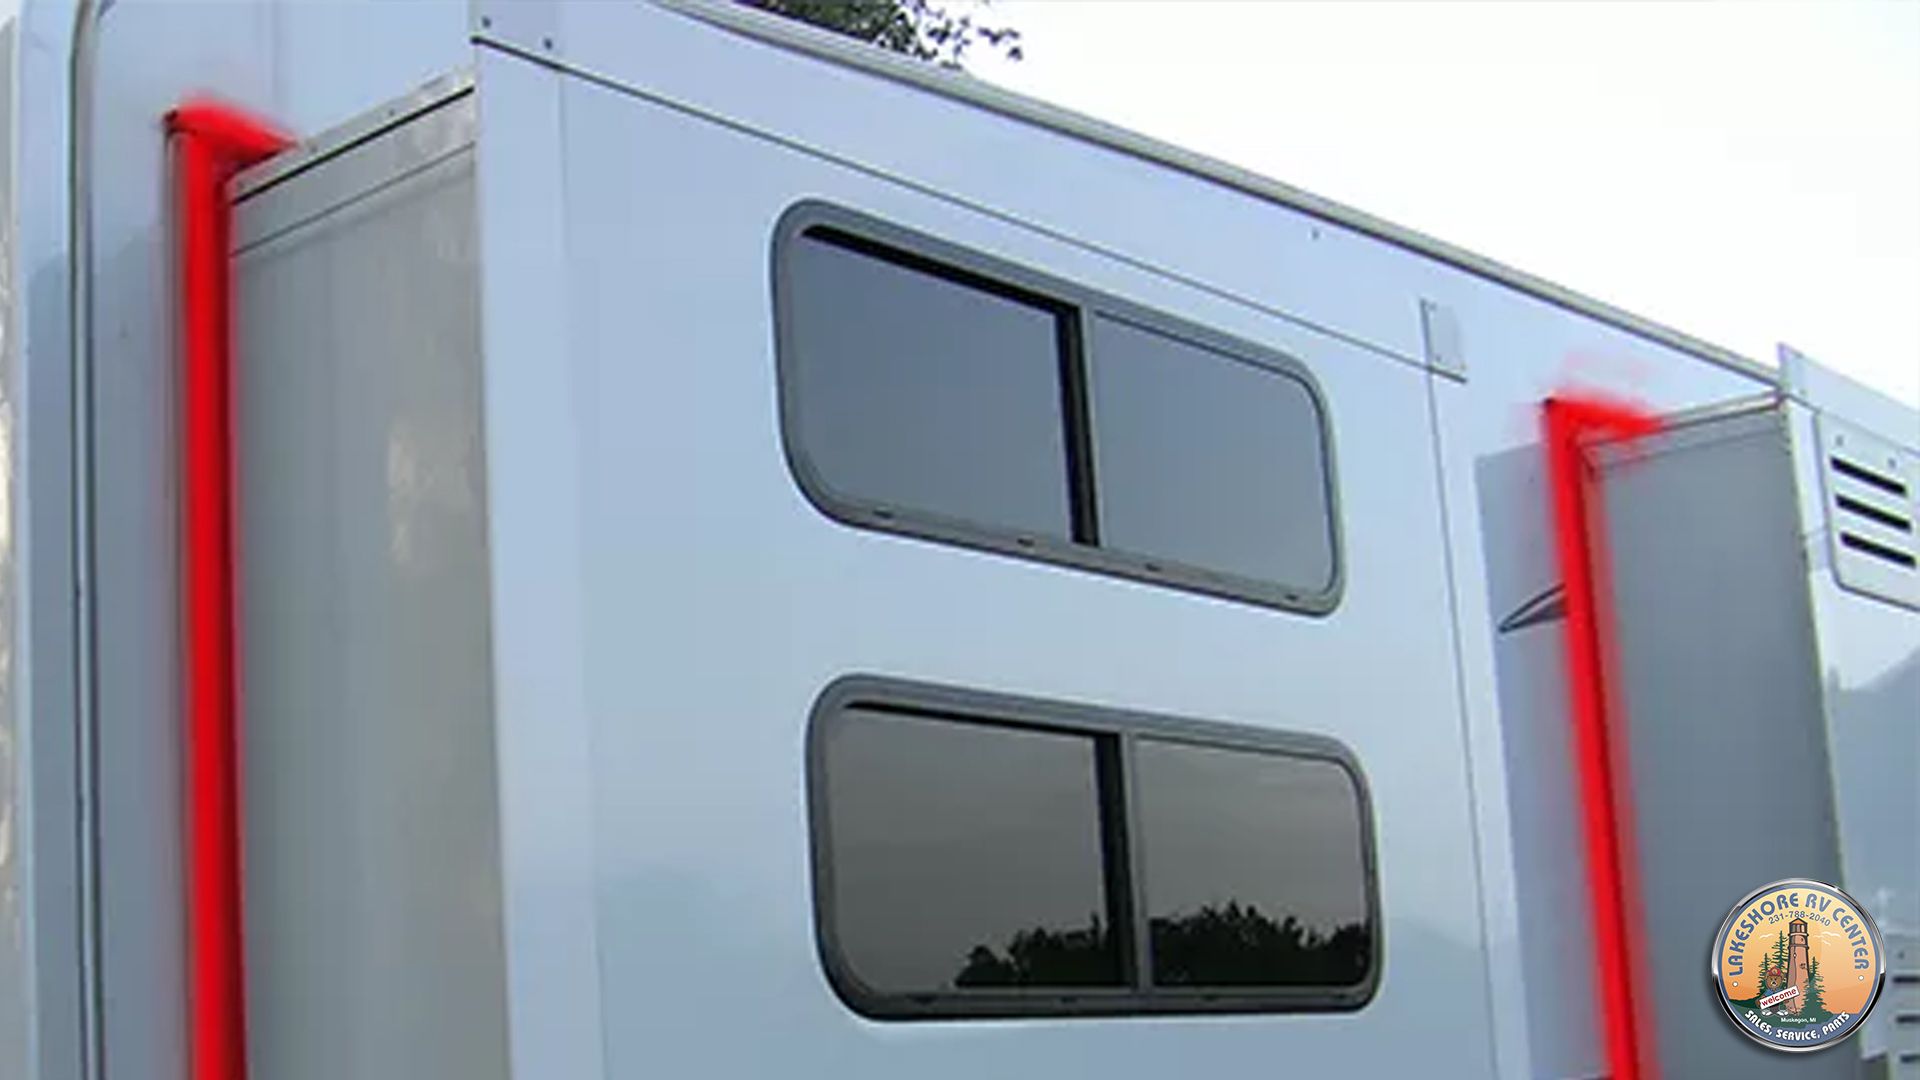
Will inspect all insert moldings & rain gutter ends, also will attempt to tighten any loose moldings unless water damage has already set in. enter image description here

https://24-7motorcoachservicecenter.com/las-vegas-rv-motorcoach-reseal-rv-body-seals.php

24/7 MotorCoach Service Center 3930 W. Windmill Lane #130-B Las Vegas Nevada 89139

702-757-2471

RV Awning Replacement

- comments

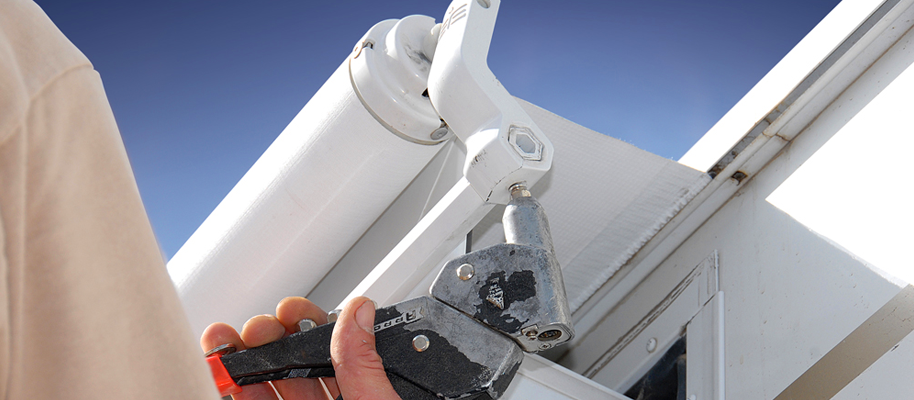
enter image description here RV Awning Replacement Why RV Awnings Break

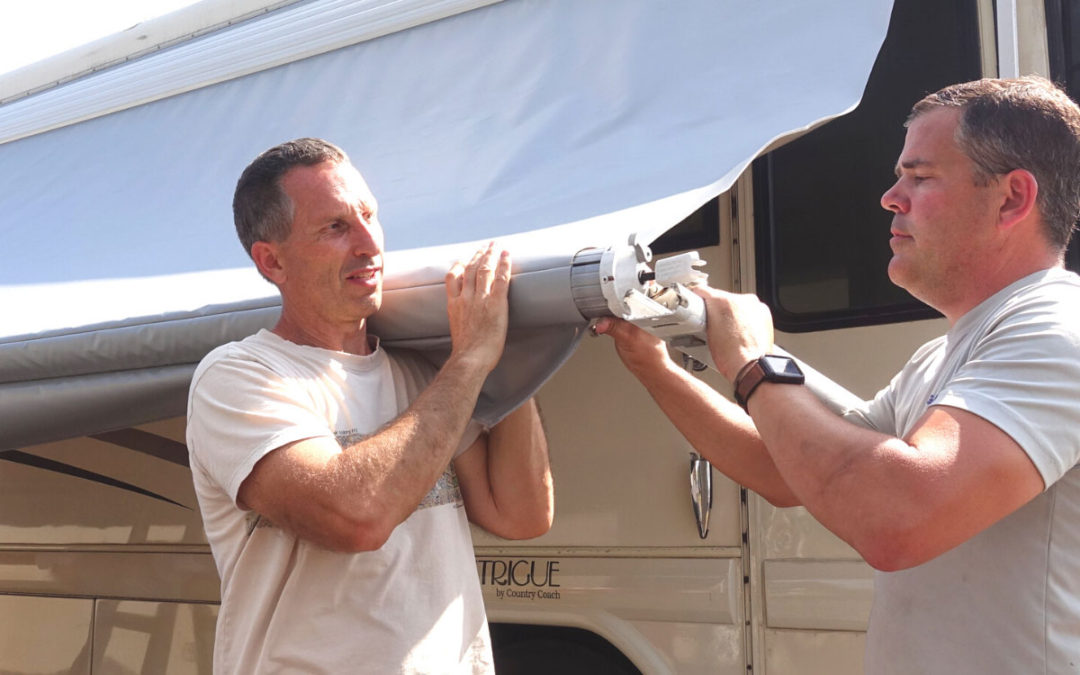
Awnings can be easily damaged by things like wind, trees, signs, posts, fences, walls, other vehicles and more. Because of this, we’ve seen plenty of RVs come in needing repair or replacement.

When you retract your awning, the brake mechanism locks it into a closed position and it can get worn down over time. This part of the awning isn’t usuaully checked on a regular basis, so it can often break “unexpectedly" and in most cases it happens when driving down the road. The awning will slip down and the high winds will cause it to fold out and once this happens, either the fabric or the entire aluminum frame breaks off.

Within the awning roller, there are a set of cams and torsion spring. These parts were made to maintain tension on the roll and keep everything locked into position. However, over time, the cams’ ability to hold tension on the spring diminishes. While you can’t always see them very easily, they’re found inside of the awning rollers’ end cap.

Contact the Pro's today at 24/7 MotorCoach Service Center and we will be happy to service or replace your awning for you.

https://24-7motorcoachservicecenter.com/contact.php

24/7 MotorCoach Service Center

3930 W. Windmill Lane #130-B

Las Vegas Nevada 89139

702-757-2471

enter image description here Anything Mechanical Needs To Be Lubricated: How To Maintain Your RV’s Slide Out

Mechanical parts, in general, should always be properly lubricated, and the slide out is no exception. We recommend that you apply a dry lube; however, some may also suggest a light lithium grease– but no matter what, be sure to check with your RV manufacturer before applying anything. Beyond that, be careful when using grease on slide outs. They can gather dust and other things pretty easily, so it may be important to clean them regularly.

When applying any sort of lubrication, on hydraulic rams and cylinders, be sure to completely wipe down and clean the parts. You don’t want to see any remnants left over from the lubrication process.

Some Preventative Maintenance: How To Maintain Your RV’s Slide Out

  • Keep your 12-volt DC battery bank maintained.
  • Make sure all galley components (like propane lines, water tubing, flexible drain piping, etc.) are supported and protected.
  • Keep the upper and lower exterior side vents clear from obstructions.
  • Clean and lubricate all moving components regularly.
  • Check hydraulic fluid levels regularly.
  • Keep a look-out for abnormal wear-patterns on the interior floor of the slide out.
  • Listen for any moans or groans when moving slide out.
  • Do not keep the slide outs extended for a long period of time.

Adjusting Slide Out Rooms: How To Maintain Your RV’s Slide Out

No matter what, every slide out should be centered within the opening. Each slide out has vertical, horizontal, and lateral adjustment points and they’ll all vary. We don’t recommend any RV owners to adjust slide outs on their own. However, it’s okay to measure their positions every now and then to determine whether they have shifted or not. It’s not uncommon for slide outs to move out of adjustment over time due to some of the factors we’ve already discussed. Remember though, if you suspect any misalignment take it to an RV shop like 24/7 MotorCoach Service Center, immediately.

WE OFFER SLIDE OUT WIPER SEAL SERVICEFROM $150.00

  • Inspect slide out seals for wear, tear or damage
  • Apply U.V. treatment conditioner to exterior slide out seals to extend the seal life, which will reduce wear, tear & repel rain
  • Inspect slide out seams, sealants, rollers & hardware
  • Lube slide rams, cables & motor (where accessible)
  • *Additional charge for slideout-toppers

24/7 MotorCoach Service Center

3930 W. Windmill Lane #130-B

Las Vegas Nevada 89139

702-757-2471

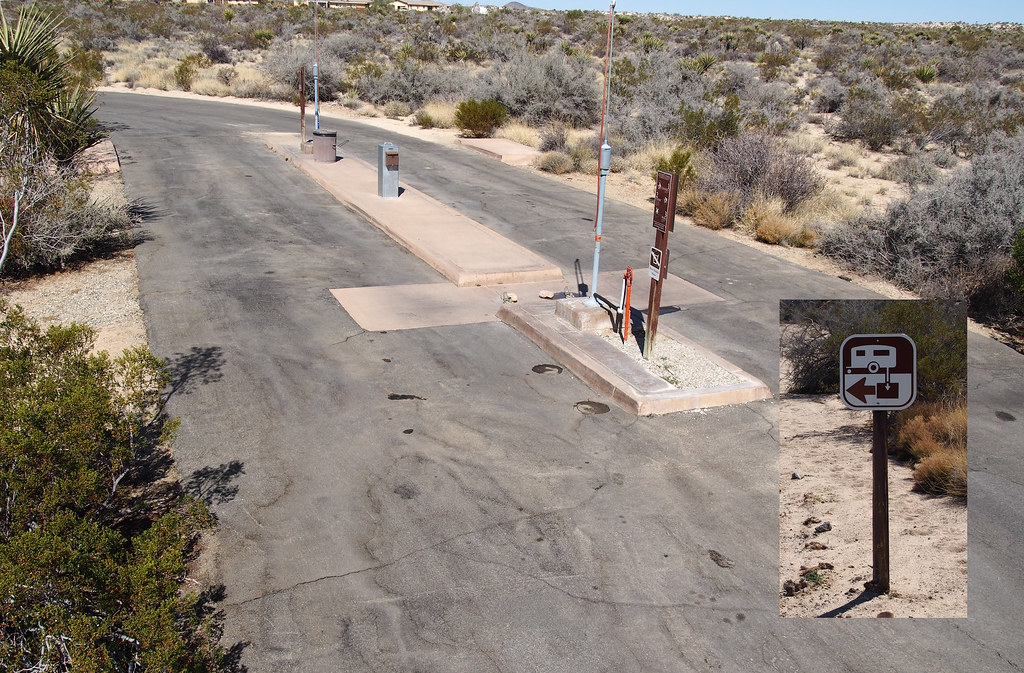
enter image description here Tips for using the campground dump station

Here are some tips to follow when emptying your RV’s holding tanks after a great camping weekend.

  • Wear protective rubber gloves and avoid touching the outside of the gloves. It's a good idea to keep a box of disposable gloves in your RV's utility center or in the basement close to the utility area.

  • When emptying both the black and gray tanks, dump the black-water tank before the gray-water tank so the “soapy water” from the gray tank can clean the residue from the hose.

  • Don’t dump the black-water tank until it is at least two-thirds full. Don’t leave the black-water tank valve open when hooked up at a campsite. This will cause liquids to drain, leaving solid waste behind to harden on the bottom of the tank.

  • After dumping the black-water tank, immediately fill it to approximately 1/3 full. Again, this will prevent the solids from building up in the bottom of the black-water tank.

  • Use a quality sewer hose. A quality hose only costs a little more but is well worth the expense to avoid frustration and maintain a sanitary environment.

  • Carry an extra garden hose for rinsing in case the dump station doesn’t have one.

  • If the dump station has a dedicated faucet for flushing out your holding tank(s), use your extra garden hose to flush the tank(s) while dumping.

  • Store the extra hose in an area where it won’t come into contact with your drinking water hose.

  • Never use your fresh water hose for rinsing sewer hoses or the dump station area

  • If others are waiting to use the dump station, skip the tank flushing and hose rinsing steps. Pull away from the dump station and then add some water and chemicals to the holding tanks.

  • Most liquid holding tank chemicals recommend 8oz of chemical per 40 gallon capacity.

  • Never put anything other than the contents of your holding tanks into the dump station.

  • Leave the dump station area cleaner than you found it.

We offer Tank Dumping Service Starting at $15

24/7 MotorCoach Service Center

3930 W. Windmill Lane #130-B

Las Vegas Nevada 89139

702-757-2471

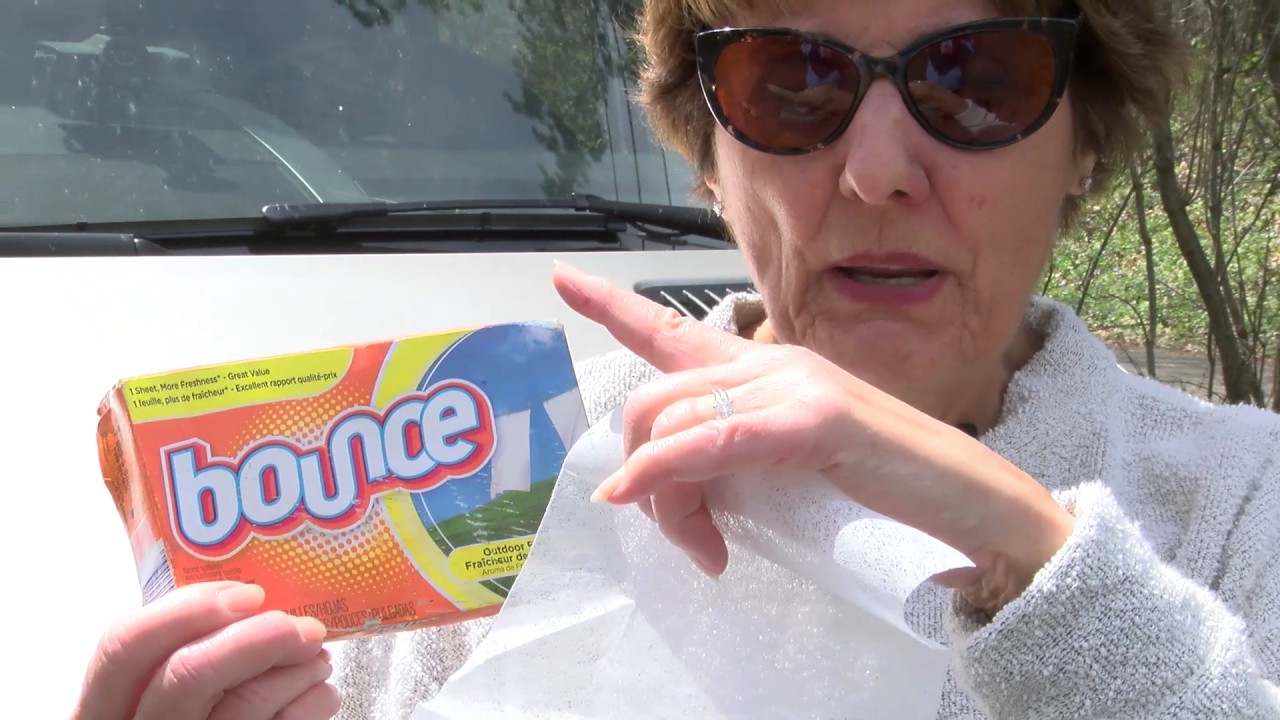
enter image description here RV Front Cap Bug Removal

Did you know that if you save your Bounce dryer sheets, they do a great job of removing bugs from the front cap of your RV, 5th wheel or travel trailer. TRY IT!

And all this time we've just been putting Bounce in the dryer. Check out these other great uses for Bounce:

  1. Get rid of ants: It will chase ants away when you lay a sheet near them.

  2. Musty book smells: It takes the odor out of books and photo albums that don't get opened too often.

  3. Repels mosquitoes: Tie a sheet of Bounce through a belt loop when outdoors during mosquito season.

  4. Eliminates static electricity from your television screen. Since Bounce is designed to eliminate static cling, wipe your TV screen with a used sheet of Bounce to keep dust from resettling.

  5. Dissolve soap scum from shower doors. Clean with a sheet of Bounce.

  6. Freshen the air in your home. Place an individual sheet of Bounce in a drawer or hang in the closet.

  7. Prevent thread from tangling. Run a threaded needle through a sheet of Bounce before beginning to sew.

  8. Prevent musty suitcases. Place an individual sheet of Bounce inside empty luggage before storing.

  9. Freshen the air in your car. Place a sheet of Bounce under the front seat.

  10. Clean baked-on foods from a cooking pan. Put a sheet in a pan, fill with water, let sit overnight, and sponge clean. The anti static agent apparently weakens the bond between the food and the pan while the fabric softening agents soften the baked-on food.

  11. Eliminate odors in wastebaskets. Place a sheet of Bounce at the bottom of the wastebasket.

  12. Collect cat hair. Rubbing the area with a sheet of Bounce will magnetically attract all the loose hairs.

  13. Eliminate static electricity from venetian blinds. Wipe the blinds with a sheet of Bounce to prevent dust from resettling.

  14. Wipe up sawdust from drilling or sand papering. A used sheet of Bounce will collect sawdust like a tack cloth.

  15. Eliminate odors in dirty laundry. Place an individual sheet of Bounce at the bottom of a laundry bag or hamper.

  16. Deodorize shoes or sneakers. Place a sheet of Bounce in your shoes or sneakers overnight so they will smell better in the AM.

24/7 MotorCoach Service Center

3930 W. Windmill Lane #130-B

Las Vegas Nevada 89139

702-757-2471

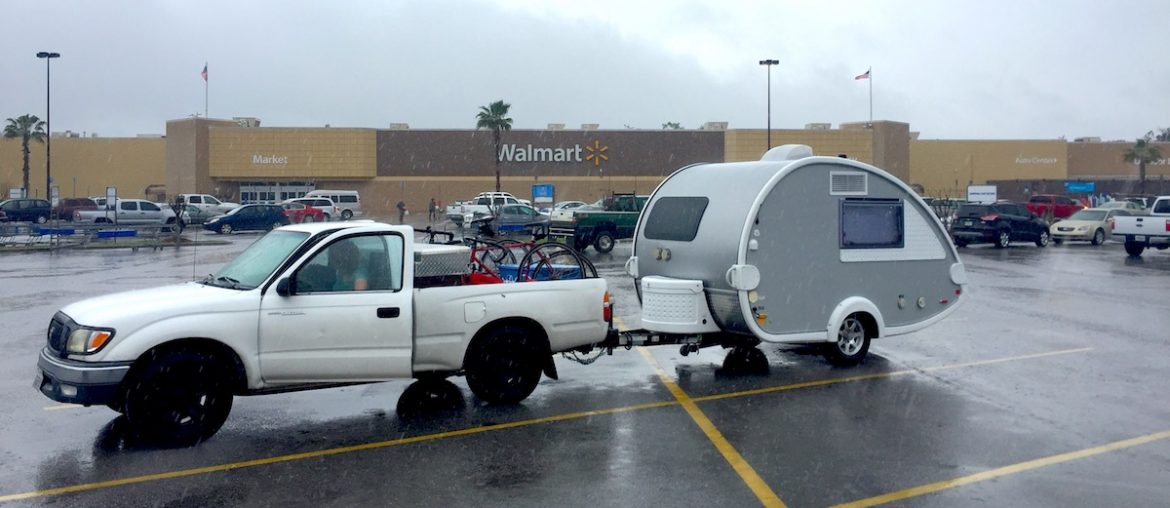
enter image description here Walmart Overnight RV Parking Etiquette

Some of the most respected RV consumer clubs have joined together to support your right to park on private businesses’ parking lots overnight under the following code of conduct. The code pertains to establishments that permit “dry camping” on their lots. Dry camping means camping without the use of external hookups for electricity, water supply or waste disposal.

Industry-Sanctioned Code of Conduct (RVers’ Good Neighbor Policy)

  • Stay one night only!
  • Obtain permission from a qualified individual.
  • Obey posted regulations.
  • No awnings, chairs, or barbecue grills outside your RV.
  • Do not use hydraulic jacks on soft surfaces (including asphalt).
  • Always leave an area cleaner than you found it.
  • Purchase gas, food, or supplies as a form of thank you, when feasible.
  • Be safe! Always be aware of your surroundings and leave if you feel unsafe.

If your plans include touring the area, staying for more than one night, or necessitate conduct not within the code, please relocate to a local campground. It’s the right thing to do!

Most of the complaints lodged regarding RV parking on business parking lots have to do with aesthetics and perceived abuse of the privilege. There are a variety of competing interests that were balanced to arrive at this industry-sanctioned code of conduct. As you can see, this Code of Conduct is nothing more than an RVers’ “Good Neighbor” policy.

Not following the code has serious consequences and is detrimental to the rights of all RVers. Already, some municipalities have passed ordinances to prohibit parking on private business property overnight.

Please do not take offense to this letter; it is only provided as a reminder that RVers must be perceived as good neighbors, or there will be more pressure to institute state, county and local ordinances to prohibit parking on private business property.

**24/7 MotorCoach Service Center

702-757-2471

3930 W. Windmill Lane #130-B

Las Vegas Nevada 89139**

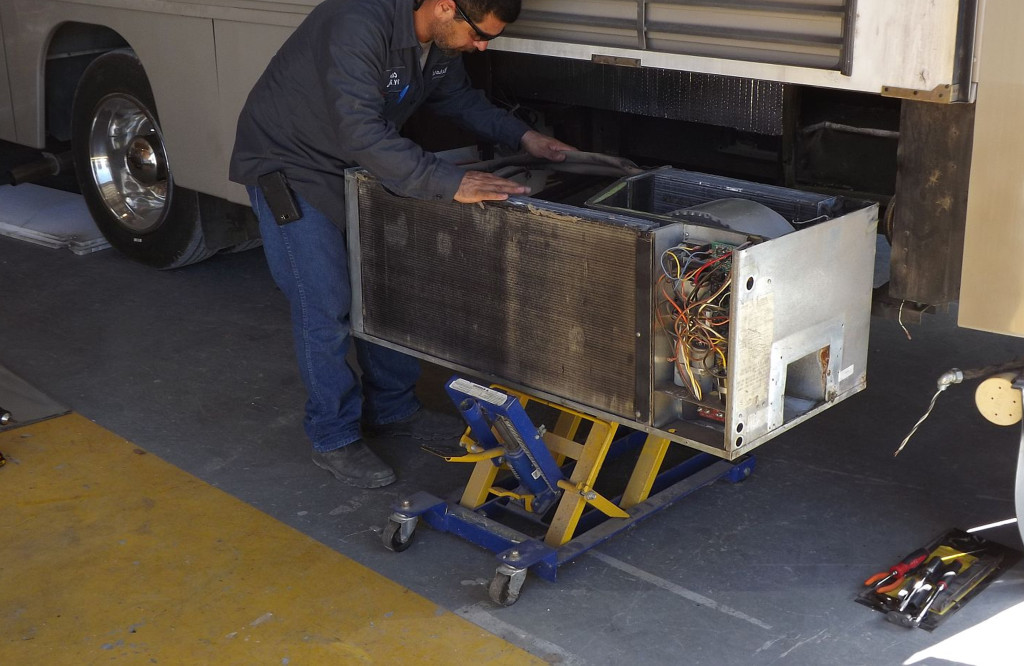
enter image description here RV Air Conditioner Service On a hot summer day, it is safe to say that you probably could not stand being inside your RV without air conditioning. So if your air conditioner were to go out, you would probably start scrambling to find someone capable of fixing it by either coming to you or you going to them.

RV’s come equipped with either a rooftop A/C, basement A/C, or some even decide to equip their RV with two rooftop A/C’s. Some A/C’s units are central meaning there are several vents spaced accordingly and all attached to the main duct on the A/C, versus those that just blow directly from the ceiling assembly. And just like your central A/C at home, all A/C’s in your RV have a return air filter that will need replacing and cleaning ever so often, failing to do so could hinder its efficiency.

We offer RV Air Conditioning Service FROM $100 Per Unit

Recommended annually to maximize the operating efficiency of the cooling system:

  • Examine shroud for cracks or damage
  • Check compressor voltage
  • Check compressor amperage
  • Remove & clean A/C filters
  • Clean & unclog A/C roof drains
  • Check evaporator coil temperature
  • Torque A/C assembly gasket

https://24-7motorcoachservicecenter.com/rv-air-conditioner-repair.php

24/7 MotorCoach Service Center

702-757-2471

3930 W. Windmill Lane #130-B

Las Vegas Nevada 89139

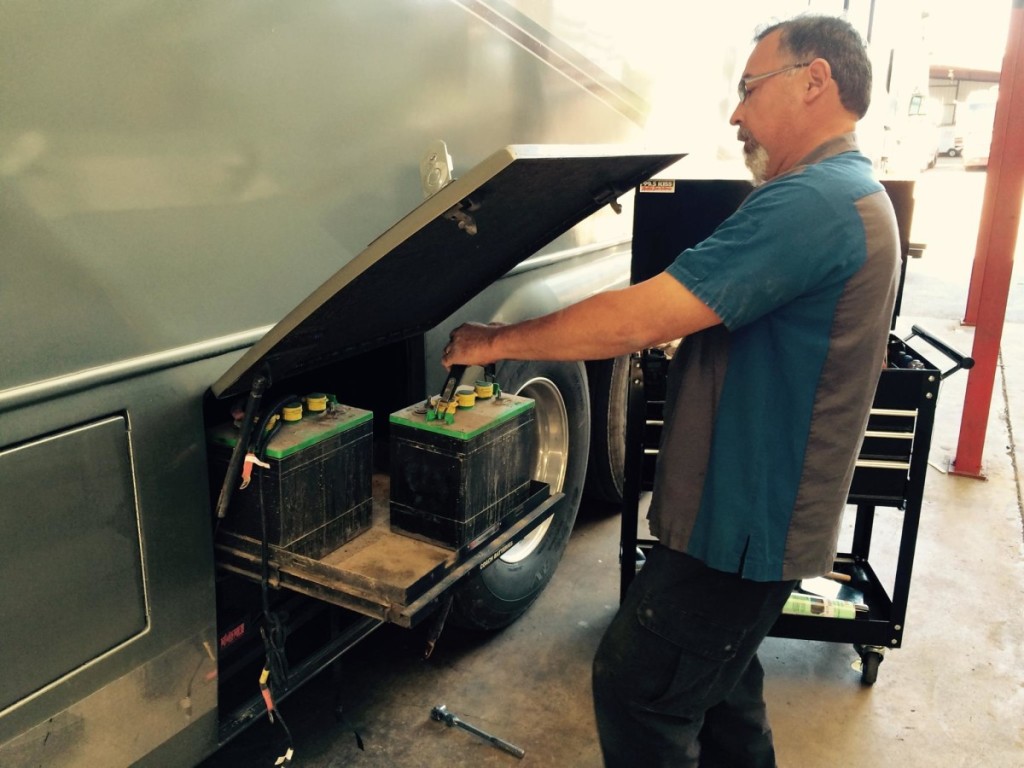
enter image description here Maintaining RV Batteries

Batteries are a necessity for operating a large amount of your RV’s components, and without that power, you might as well be sleeping in a tent. From your refrigerator to your television to your lights, batteries give you the amenities that made RVing so attractive in the first place. When considering its importance, RV owners should know how to maintain and repair their power source.

When inspecting or repairing your battery, safety is always a top priority. Wear safety glasses and rubber gloves, and use the right tools for the job (terminal puller, spreader cleaning tool).

Typically, RVs will have at least one 12 volt deep cycle battery, while others have two or four 6 volt batteries. When you plug into shore power you power up a converter or inverter/charger that replenishes the battery. Additionally, most manufacturers allow the automotive alternator to charge the house batteries while in operation.

To understand the technical differences between battery types, consult your owner’s manual or pick up a copy of an in-depth RV maintenance guide. For our purposes, we’ll stick to general battery maintenance and repair.

Most RV batteries are considered ‘wet batteries,’ which means they are operated off of a liquid electrolyte solution. Maintaining this type of battery requires adding distilled water to the cells, which is sometimes difficult depending where the manufacturers mount the battery tray. You can pick up distilled water at just about any grocery store and use a funnel to carry out the task.

Cleaning of the cables and the posts is also very important; visually check to see if they are corroded, which would require replacement. Many problems can arise because of lose connections at your battery, and grounding to the frame of your RV should be secure.

How many times have you arrived at your RV after days or months sitting in storage and you find your batteries are dead? Batteries must be kept charged, and when in storage you must disconnect the batteries from your RV. Most RVs will have a battery disconnect, but they are very simple to install if there isn’t one.

If you still have dying batteries when you’ve taken all the precautions, ask yourself how old your batteries are? Perform a load test on the batteries individually to see if they are faulty, and if they are, your battery retailer may prorate a replacement. Unfortunately, load testers are expensive and usually only found at qualified repair facilities.

High-level battery repair and maintenance isn’t for everyone, but if you understand the basics, you can avoid a major headache or trip to the mechanic. That said, it’s best to err on the side of caution and use a qualified RV mechanic to troubleshoot advanced issues.

Battery maintenance and repairs require some basic knowledge and common sense safety precautions, though if you think you’re in over your head, it’s best to call and schedule all of your RV Service and RV Maintenance needs with our RVIA/RVDA Professionally Trained Techs.

We offer the following RV Battery Service: FROM $35 Per Battery

Service includes the following:

  • Clean terminals, connections & seal
  • Adjust water levels and load test batteries
  • Inspect trays, and straps for any damage
  • Check venting and ducting on vented boxes
  • Grease seals (prices vary on axle sizes)
  • Test break-a-way switch & brake lights

*Extra charges for battery watering kits

https://24-7motorcoachservicecenter.com/las-vegas-rv-motorcoach-battery-service.php

24/7 MotorCoach Service Center

702-757-2471

3930 W. Windmill Lane #130-B

Las Vegas Nevada 89139

RV Wheel Bearing Pack

- comments

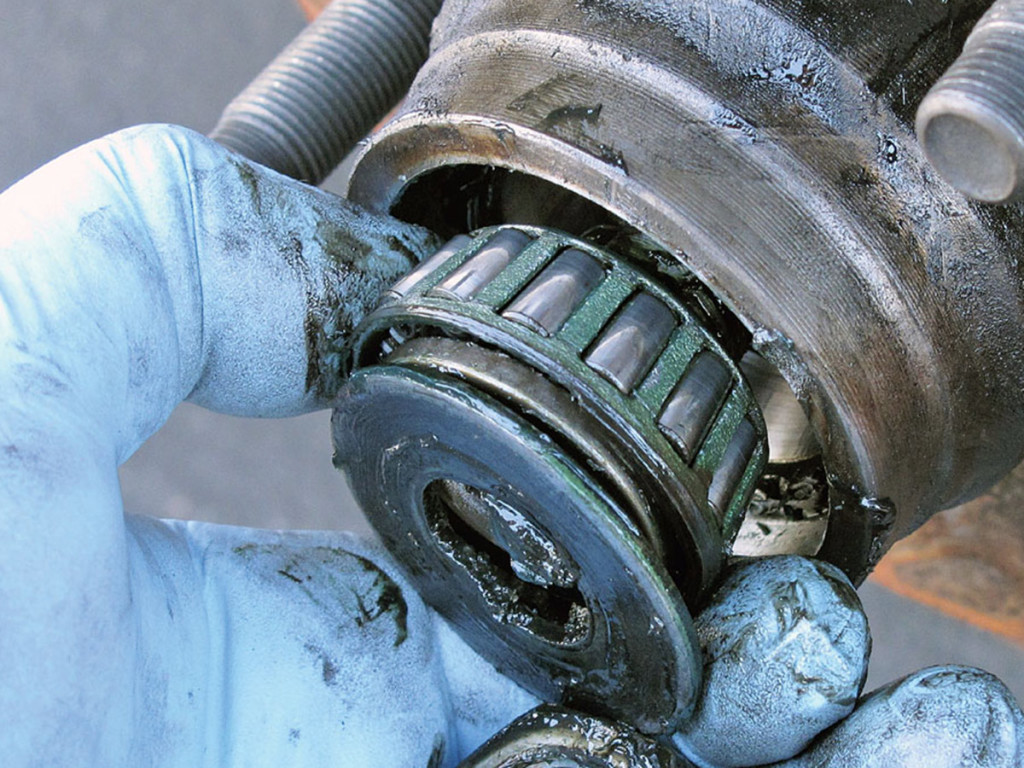
enter image description here Your trailer's wheel bearings play a vital role in supporting the trailer's weight and allowing the wheels to spin without putting excessive stress on the trailer axle. The number one reason for wheel bearing failure is due to improper maintenance, which means your RV trailer bearings must be inspected or replaced according to the service intervals established by the manufacturer.

Improper maintenance of your wheel bearings isn’t just a risk to yourself; not properly servicing your wheel bearings can compromise the safety of the passengers in the tow vehicle and those that share the road with you. Failure to maintain axle bearings can cause your wheels to fall off while the trailer is in motion.

To avoid such wheel bearing hazards, follow these important steps for maintenance and repair:

  • Refer to your RV owner’s manual to determine when your wheel bearings should be serviced. As a rule of thumb, most RV owners should inspect and grease wheel bearings at least every 10,000 miles.

  • Safety first! Use the proper lifting equipment/jack for the task at hand by verifying you are using the proper “weight” rated jack stands. Beyond making sure you have the right tools; the most important safety equipment you can get are safety glasses and hand protection/gloves. Of course, dress appropriately and remove all jewelry.

  • Check the owner’s manual for the proper torque values for the wheel bearings and wheel lug nuts. Wheel lug nuts will become loose over a period of time so it’s vital to verify proper wheel lug nut torque even before a wheel bearing service is performed.

  • Obtain a proper trailer jack and block all tires on the opposite side with wheel to ensure your safety while servicing the trailer.

  • Remove the wheel, center cap from wheel hub and cotter pin from axle nut (the axle nut will have “six” notches that line up with cotter pin hole in the axle/spindle). Then remove the “flat” thrust washer and outer hub bearing.

  • Keep all the parts you just removed in the order that they were removed and place the removed parts in a suitable container to keep out dirt or debris.

  • Firmly pull on the wheel hub to remove from axle.

  • Use a proper wheel bearing seal remover to remove the seal from the outside/brake side of the wheel hub. You can then discard the wheel bearing seal because you will be installing a new seal during reassembly. Remove inner wheel hub bearing (protect this bearing from dirt/debris also).

  • With proper wheel grease (not all axle grease is compatible with other types of axle grease), repack both the inner and outer wheel hub bearings. If you do not have a wheel bearing packer you can use hands to work in the new grease; a technique called ‘packing the wheel bearings.’

  • Place the wheel hub on a flat surface with the inner wheel bearing facing you and install the freshly packed inner wheel hub bearing.

  • Then replace the inner wheel bearing's old grease seal with the new seal. Turn the new grease seal (the biggest, flattest part) facing you and use the proper seal driver to install the seal. Apply a light coating of grease to the lip of the seal.

  • Install the assembled hub back onto the axle/spindle and then put in the outer bearing, the flat washer and finally the axle nut. Follow the proper axle nut torque procedures in your owner’s manual.

  • Now install the castellated tab that goes over the axle nut. Align the castellated nut cover with the cotter pin hole in the axle, and then install the new cotter pin and outer grease cap.

  • Now adjust the trailer wheel brake. A slot in the rear of the brake drum will provide access to a star wheel for adjusting the brake's friction. The star wheel won't be visible as it’s hidden inside the drum, but it looks like a small bicycle sprocket.

  • Remove the plug from the slot and insert a flat-head screwdriver to turn the star wheel. Adjust the tension until the wheel will no longer spin and then back off your turn one notch at a time until the wheel is spinning with minimal drag.

  • Reinstall wheel/tire and torque wheel to specs and you’re done!

We Offer the following Wheel Bearing Pack Service for your RV, Coach & Trailer: FROM $250

  • Service includes the following:
  • Inspect brakes, bearings & all hardware
  • Inspect, clean & repack wheel bearings
  • Adjust brake lining as needed
  • Check operation of electric brake magnets
  • Grease seals (prices vary on axle sizes)
  • Test break-a-way switch & brake lights

Call or Visit us Today! And schedule all of your RV Service and RV Maintenance needs with our RVIA/RVDA Professionally Trained Techs at:

24/7 MotorCoach Service Center 702-757-2471

3930 W. Windmill Lane #130-B Las Vegas Nevada 89139

RV Stir-Fry

- comments

enter image description here RV Stir-Fry

Stir-fries are simple, delicious and healthy! Pick some veggies, your favorite protein, and some sauces or seasonings that are probably already in your pantry. There’s always the classic combination of chopped beef, broccoli, sliced carrots, green onion, and snap peas, but you can use any ingredients you prefer.

Start by cooking your protein in vegetable oil in a large skillet over medium-high heat for a few minutes. Once it’s browned, make a well in the center of the skillet and add your veggies. Cook and stir for a few more minutes. Add salt, pepper, sesame seeds, and soy sauce. Once the veggies are tender, it’s ready to serve! Campfire Stir-fry

If you’re cooking over a campfire, use your largest cast iron skillet or pot to cook all your ingredients so you have plenty of room to stir. Follow the same directions from above - cooking your protein first then adding the veggies and sauces or spices. Lastly, make sure to remove your pan from the fire once you’re done cooking so that nothing burns!

Campfire Stir-fry enter image description here

If you’re cooking over a campfire, use your largest cast iron skillet or pot to cook all your ingredients so you have plenty of room to stir. Follow the same directions from above - cooking your protein first then adding the veggies and sauces or spices. Lastly, make sure to remove your pan from the fire once you’re done cooking so that nothing burns!

Call or Visit us Today! And schedule all of your RV Service and RV Maintenance needs with our RVIA/RVDA Professionally Trained Techs at:

24/7 MotorCoach Service Center 702-757-2471

3930 W. Windmill Lane #130-B Las Vegas Nevada 89139

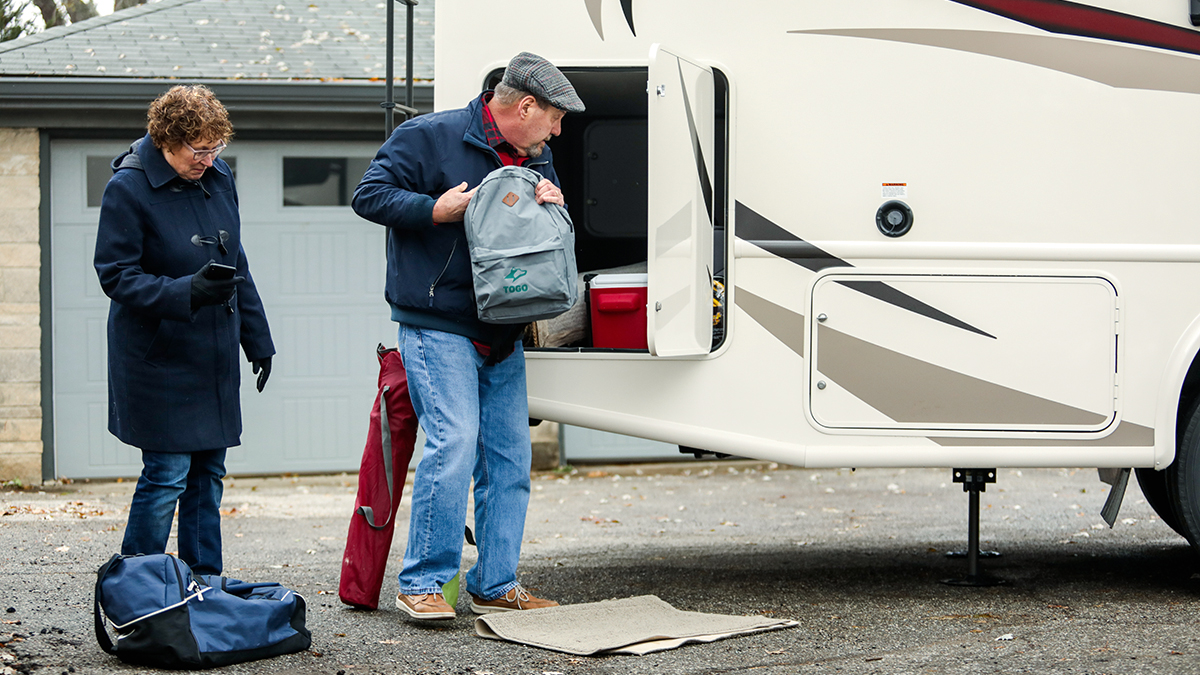
enter image description here Do you have a checklist of things you need to pack, load, or check your on-board inventory for whenever you take an RV trip? Most of us RVers do, even if that checklist is only in our heads. And, of course, those of us that rely only on our minds sometimes fall a bit short of remembering the complete list.

But whatever method you use to pack your RV, there are seven things that you should hardwire to memory, no matter if your mind goes into a temporary freeze or the dog eats your checklist.

The Essential Seven Must-Haves For RVers

Toilet Paper – Unless you have a supply of corncobs or old Sears catalogs, make sure someone in your family didn’t use up the last roll. Always check your supply – then double what you think you will need.

Peanut butter – Bring each of your family member’s favorite foods or snacks. These comfort foods are important so camping doesn’t present so much of a disconnect from daily life to induce uncomfortable cravings.

The co-pilot – If you’re the driver, glance over to the other seats to make sure your significant other (wife, husband, smiling teenager, or dog) is seated there. If not, you’re already in trouble. But turn around anyway and head back for the overlooked family member.

First-Aid Kit – This is likely something that stays on board. Its contents may get slowly used up until you run out of some important item and you don’t realize it until you need it until you are light years from the nearest Walgreens or Walmart. Check the contents before every trip against the list of what the kit comes with. If you don’t have a first aid kit, get one now.

Raincoats – The sun may be shining brightly when you leave, but if you are headed to the mountains or shore, unexpected wet weather can blow through without much warning, and you don’t want to have the whole family cooped up in the confines of your RV because you forgot the rain gear. If you have it, you will go out and play in the rain and it will be fun and memorable.

Cold weather clothing – Similarly, if you are going camping in potentially cooler locations (mountains, seacoast), you could experience colder evenings and mornings than at home. You will also spend more time outside – hiking, fishing, sitting by the campfire – so make sure every family member has multiple layers and a heavy jacket for those chilly times.

Bicycles for everyone – If you forget your grandaughter’s bike, nobody will go riding if she can’t. Have a great trip!

Call or Visit us Today! And schedule all of your RV Service and RV Maintenance needs with our RVIA/RVDA Professionally Trained Techs at:

24/7 MotorCoach Service Center 702-757-2471

3930 W. Windmill Lane #130-B Las Vegas Nevada 89139

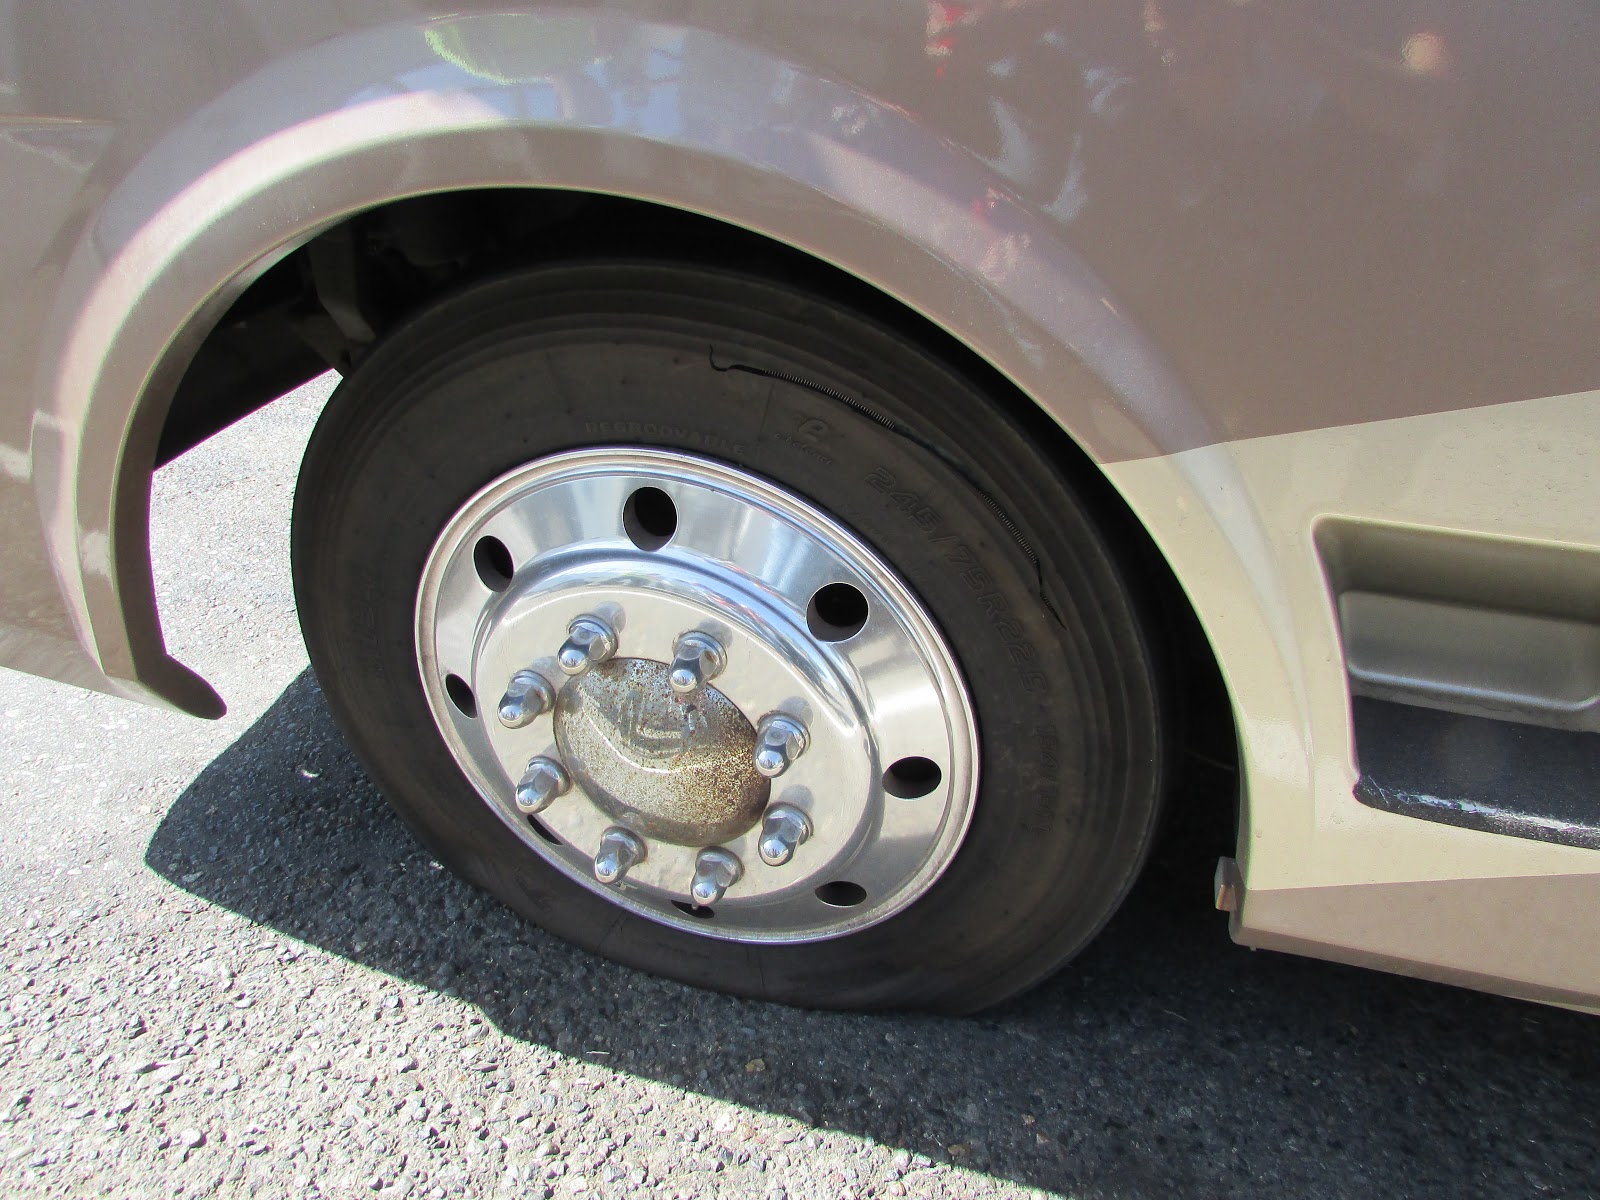
enter image description here To prevent RV tire problems, here are a few pre-trip suggestions:

  • Make sure all of the lug nuts are secure and your tire valves have valve caps.
  • Inspect tires for uneven wear patterns on the tread, cracks, foreign objects, or other signs of wear or trauma - pay particular attention to sidewalls for cuts or abrasions.
  • Remove bits of glass and other foreign objects wedged in the tread.
  • Set inflation pressures (Note: the amount of air pressure you need depends on the weight of your fully loaded vehicle. Use the vehicle's recommended pressure, not the pressure indicated on the tire which is usually the MAXIMUM allowable pressure)
  • It is a good idea to own more than one tire pressure gauge. It is not uncommon for gauges to be off by several pounds.
  • Do not overload your vehicle. (Check the tire information placard or owner's manual for the maximum recommended load for the vehicle).
  • It may seem like an inconvenience, but it is extremely important to get your loaded vehicle weighed before you leave.
  • If you are towing a trailer, remember that some of the weight of the loaded trailer is transferred to the towing vehicle.
  • Trailers should have the wheel bearings repacked after being in storage.
  • Consider nitrogen, an insert gas that is less affected by temperature. Make sure to use green valve stem covers so that you don't accidentally re-fill with regular air!

Even with proper tire care you never know what the road may bring, Call or Visit us Today! And schedule a Tire Inspection and all of your RV Service and RV Maintenance needs with our RVIA/RVDA Professionally Trained Techs at:

24/7 MotorCoach Service Center 702-757-2471

3930 W. Windmill Lane #130-B Las Vegas Nevada 89139

enter image description here Baked Breakfast Casserole in an RV

The best thing about a breakfast casserole is that they’re always tasty no matter what ingredients you have on hand. One of our favorites is a combination of eggs, diced potatoes, crumbled sausage, and cheese.

In an oven-safe baking dish, add:

•   2 cups of diced potatoes
•   4 crumbled sausage links
•   6 to 8 eggs
•   1 diced onion
•   1 to 2 bunches of basil

Season with salt, pepper, paprika, and garlic powder. Bake at 350? for about 15 to 20 minutes until the eggs reach your desired consistency. Serve with fresh herbs and salsa.

Campfire Breakfast Casserole

No RV kitchen? No problem. You can also make a baked breakfast casserole in a dutch oven over an open fire. Cook your potatoes, sausage, and onion over the flame, then add your eggs and basil. Mix well. Then, remove your dutch oven from the fire, but still in the vicinity of its heat (the sand next to a fire usually works well). Let your casserole cook for about 25 minutes, checking at around 15-20 minutes to make sure the heat has started cooking the eggs. Enjoy!

Call or Visit us Today! And schedule all of your RV Service and RV Maintenance needs with our RVIA/RVDA Professionally Trained Techs at:

24/7 MotorCoach Service Center 702-757-2471

3930 W. Windmill Lane #130-B Las Vegas Nevada 89139

RV Detailing

- comments

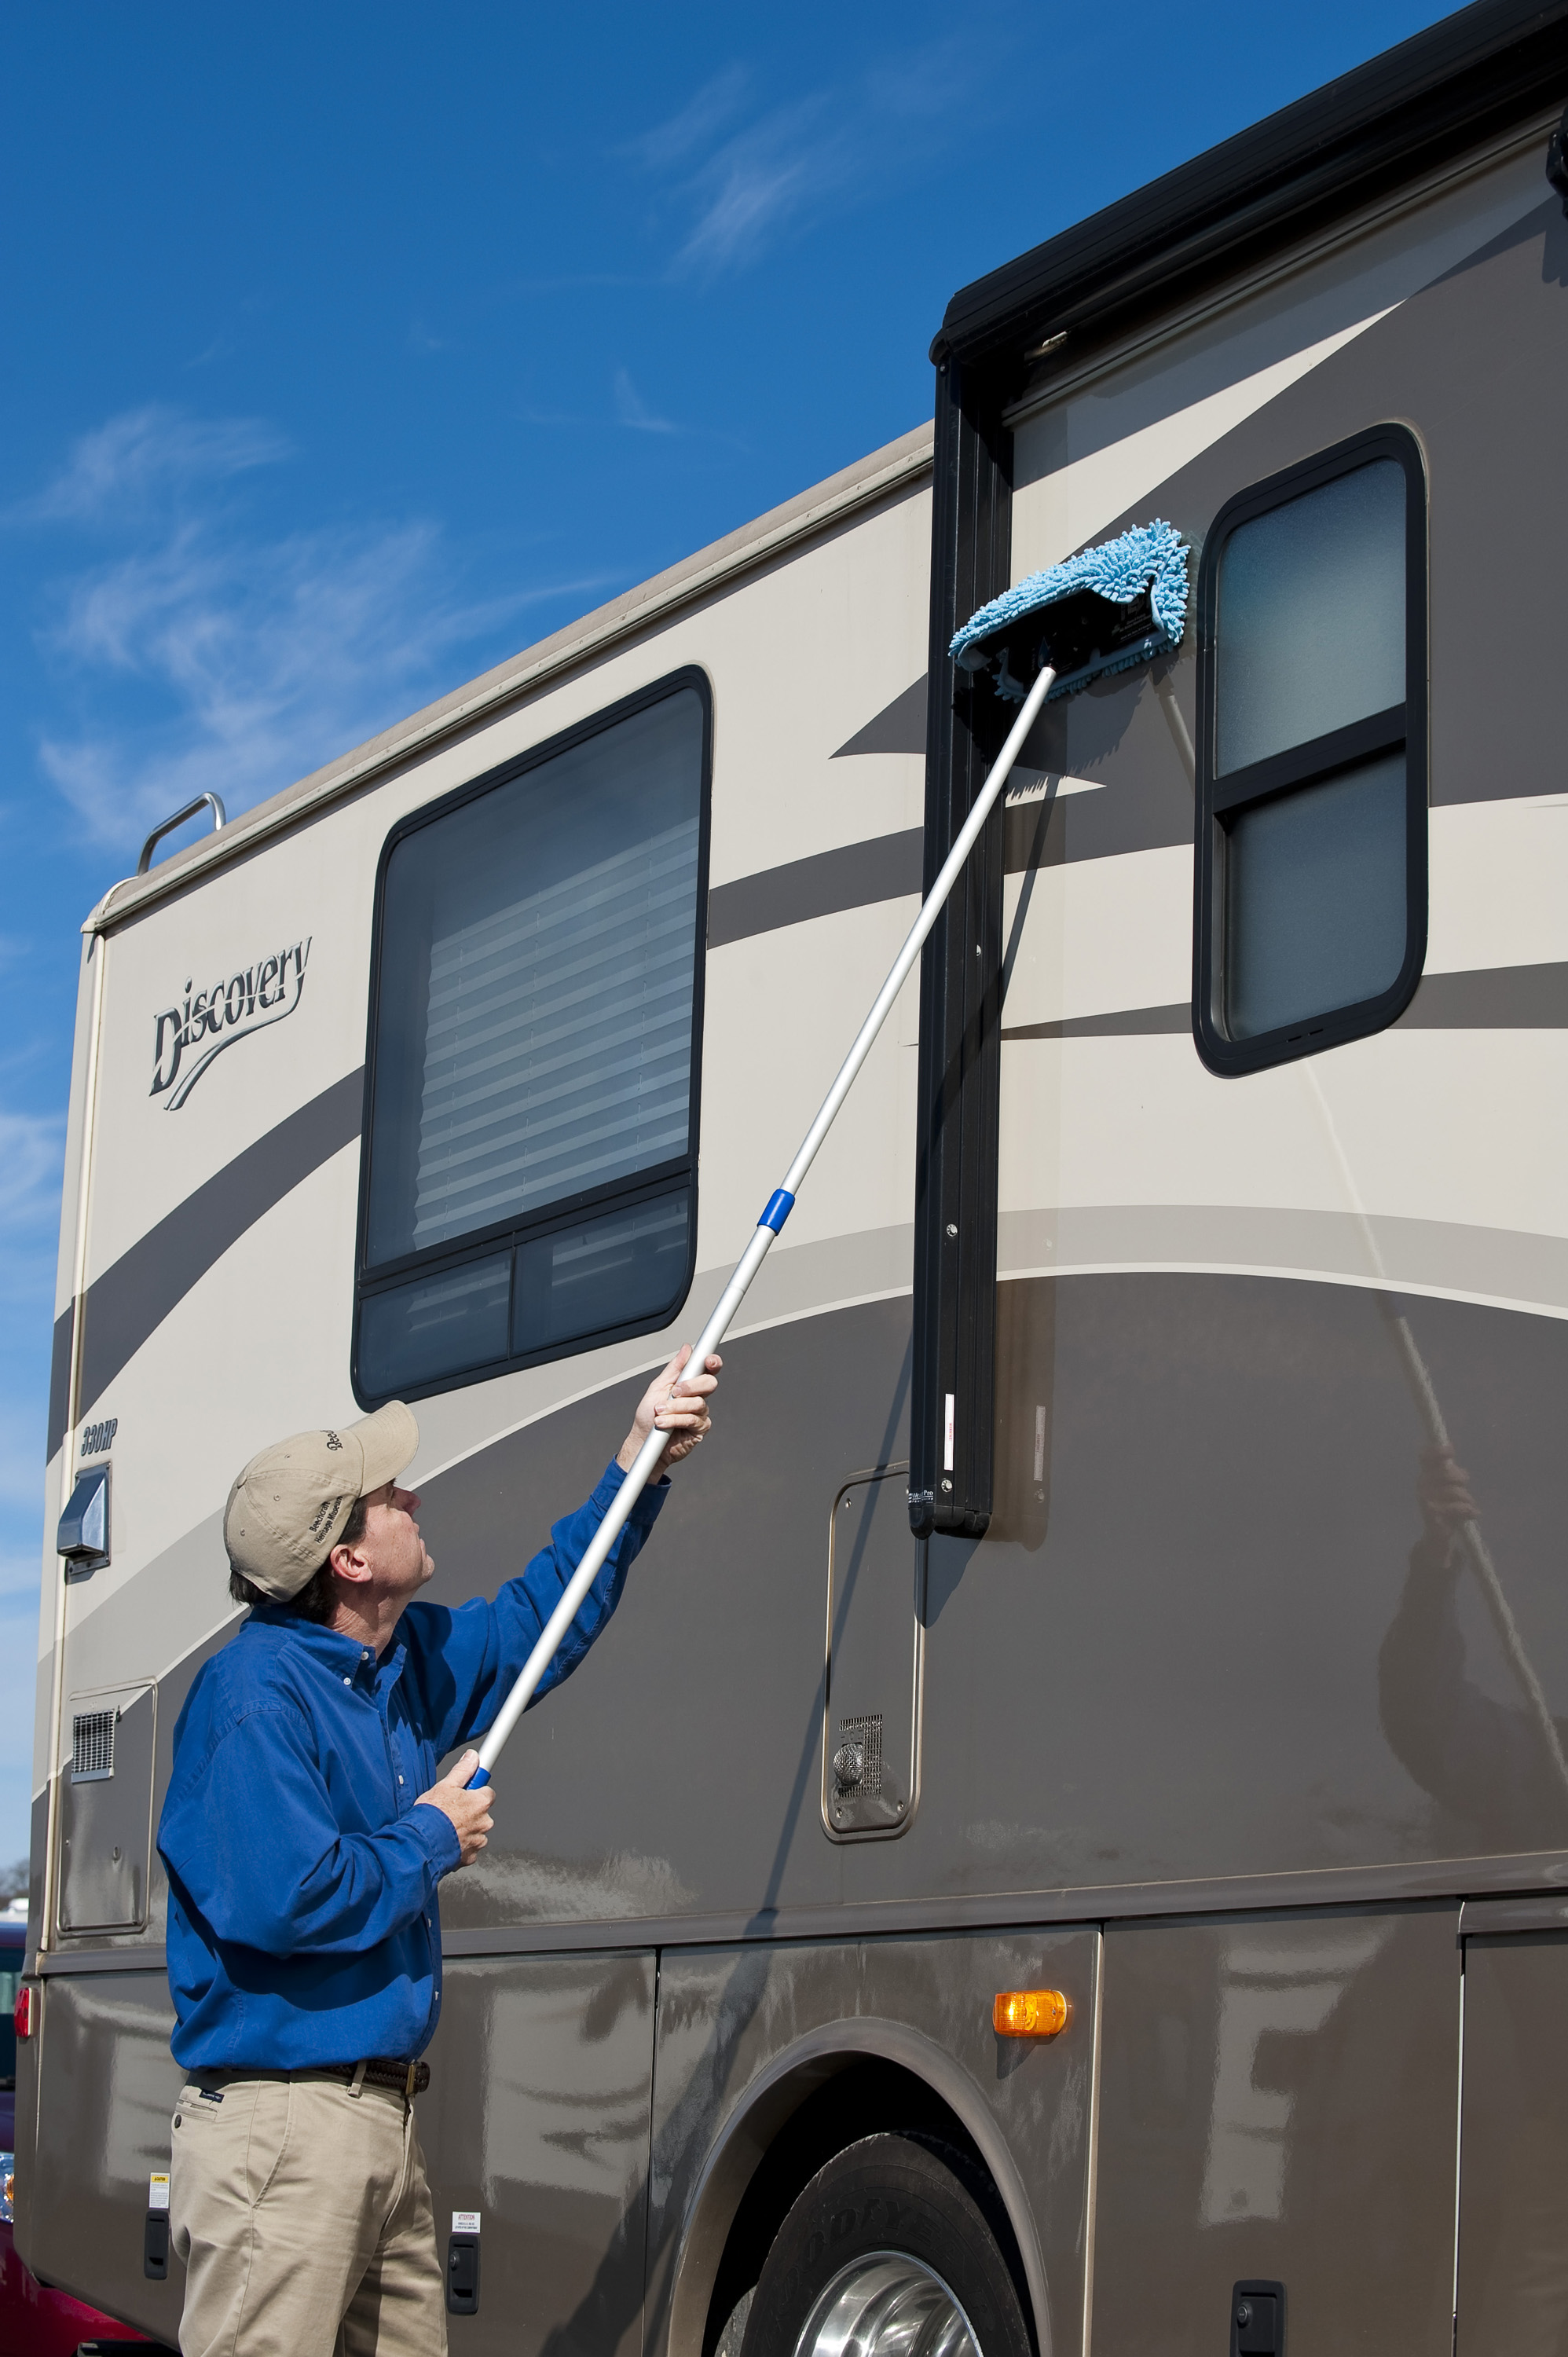
enter image description here RV Detailing

Have you been twitching with excitement about the beginning of RVing season? But somehow you just can’t seem to get started on your RV’s Spring cleaning and prepping for your first Spring camping trip?

The hardest part is getting started. Once you’re hands on with the chore, you will get a roll on. So to help you get started, here is a brief list of tips. Pick the item that is the easiest to start with, and after you check it off the list you will easily transition to the next, and the next, and the next.

EXTERIOR Wash the outside. When you see how spiffy it looks that becomes a great incentive to continue.

Use the proper cleaning products for fiberglass, rubber, windows, and for removing bugs. These are available in RV supply stores like Camping World.

A long-handled telescoping pole with multiple attachments (brushes, squeegee, soft mitt for waxing, etc.) will make your job easier.

This is also the right time to inspect for cracks in caulking around windows and roof mounted vents and TV antennas.

Inspect inside for any evidence of water leaks.

Clean your wheels and tires and while at it inspect tire tread depth and look for cracks in tread and sidewalls. If in doubt, have a professional inspect the tires and determine whether replacement is necessary. Use a cleaning agent specific for tires and wheels.

Various companies make a thin plastic film that you can apply to the front of your rig to make cleaning off bug juice and road grime easier. It also helps prevent rock dings.

When you’re finished with the exterior cleaning, it’s time for waxing. There are products that claim to wax and wash at the same time, while on the other end of the product list are paste waxes that require an electric buffing tool and lots of grunt work. Bottom line – the easier it is the least amount of time the coating will last. Put in the work and you will have a shiny vehicle much longer.

We Offer the following Exterior RV Detailing Services:

WASH EXTERIORFROM $112.00 (min 25')

  • Pressure wash roof surface
  • Scrub and hand wash body
  • Squeegee and wipe down windows
  • Scrub, clean and apply tire dressing

    WASH & WAXFROM $800.00

  • Pressure wash roof surface
  • Scrub and hand wash body
  • Apply wax to exterior body
  • Squeegee and wipe down windows
  • Scrub, clean and apply tire dressing

PRICE VARIES SUBJECT TO INSPECTION

CLEAN UP & INSPECTIONFROM $1,750.00

  • 45 point inspection
  • Pressure wash roof and exterior body
  • Spot seal exterior roof, window and moldings
  • Remove/Replace insert molding/screw covers as needed
  • Remove/Replace drain gutter drip caps
  • Remove/Replace entry door window trim rings, hold backs and bumpers
  • Paint all plastic discolored doors and covers (white)
  • Remove/Replace all discolored clearance and entry door light lenses
  • Remove/replace compartment door hold backs/latches
  • Paint rear bumper, trailer A-frame, or 5th wheel pin box and entry door steps
  • Lube slide out rails and seals (if equipped)

PRICE SUBJECT TO INSPECTION

INTERIOR Air it out. Open the windows.

Dust all surfaces and the dash area. Use lens wipes for the glass gauges.

Use the proper product if you have leather seats. For cloth seats you can vacuum or launder thr removable covers.

After the dust has settled, vacuum the floors and carpeting. If you have the right attachments, vacuum your carpeted sidewalls, curtains, and draperies as well. Use a hand vacuum for inside cabinets, lockers, and drawers. Inspect for rodent droppings, mold, and mildew as well. Check for water leaks while you have your lead in the cabinets.

Wash the inside of windows.

WE OFFER THE FOLLOWING RV INTERIOR DETAILING SERVICES STARTING AT: $50.00 per HOUR:

  • Vacuum carpeting
  • Shampoo carpeting
  • Mop and scrub flooring
  • Clean and condition leather seating
  • Clean and protect fabric seating
  • Clean appliances, refrigerator, stove/oven
  • Clean interior windows
  • Clean wall surfaces
  • Clean lighting fixtures and ceiling fans
  • Clean full bathroom
  • Clean full kitchen
  • Clean sleeping areas
  • Clean counter tops
  • Clean cabinet surface and finishes

OXIDATION WE ALSO OFFER THE FOLLOWING OXIDATION SERVICES STARTING AT $110.00 per HOUR:

ALL MATERIALS CHARGES SEPARATELY (including wool/foam pads and rags)

This service is required for RVs with gel coat or fiberglass finishes with light to severe oxidation or rading.

We will attempt to remove all oxidation as possible. In most cases this is a four step process to completely restore your RV Finish:

  1. Proprietary process to eliminate all build-up and residue on gel coat / fiberglass.
  2. High speed polish with rubbing compound [wool pads required].
  3. Low speed polish to remove swirls. [foam pads required].
  4. Finish with an application of carnauba wax or gel coat sealer.

*This service includes an exterior wash.

Average cost range is $1,500.00 – $3,000.00 depending on unit size and condition.

https://24-7motorcoachservicecenter.com/las-vegas-rv-repair.php

Call or Visit us Today! And schedule all of your RV Service and RV Maintenance needs with our RVIA/RVDA Professionally Trained Techs at:

24/7 MotorCoach Service Center

3930 W. Windmill Lane #130-B

Las Vegas Nevada 89139

702-757-2471
enter image description here Slide Out Awnings, sometimes called Toppers, are an important component in protecting the structural integrity of your RV slide out—especially with their ability to prevent environmental damage to the seals that surround your slide out. When extended, toppers protect the roof of a slide out from rain, dirt, debris (leaves and small branches) or snow.

The purpose of the topper is to protect the seals on your slide from damage (tears or holes) that can occur when debris is pulled into the seal as the slide out moves inward and closes. As the unit rolls shut, the topper will automatically clear any water or debris it caught – pushing it over the edge of the slide. The topper prevents the alternative job of an inconvenient, hazardous climb up a ladder to sweep debris off your slide out prior to closing it. Additionally, the topper protects the seals of the slide out from deterioration due to the sun’s UV rays.

Periodically inspect your topper for wear. As a topper ages, it may begin to sag and collect water. In this case, excessive water may fall onto the top of your slide during heavy rain or from either side of the topper as the slide out retracts. This could compromise the seal of the slide and create a water leak in the interior of your RV.

RV Slide Out & Awning Topper Roof Service Fom: $300

  • Remove awning topper & inspect for damage
  • Clean slide out roof & vinyl awning topper
  • Remove slide out sealant and reseal
  • Re-install and lube topper and hardware

https://24-7motorcoachservicecenter.com/las-vegas-rv-motorcoach-slide-out-and-awning-topper-roof-service.php

Call or Visit us Today! And schedule all of your RV Service and RV Maintenance needs with our RVIA/RVDA Professionally Trained Techs at:

24/7 MotorCoach Service Center 3930 W. Windmill Lane #130-B Las Vegas Nevada 89139 702-757-2471
RV Owner Gift Ideas

- comments

enter image description here Have you ever not known what to buy someone for a birthday, Christmas, etc? You're not alone. If you're searching for the perfect gift for the RV enthusiast in your life, you're in luck. We've put together some of our favorite RV gift ideas that get a smile from even the grumpiest of RV owners.
An RV GPS It's important to plan trips in advance, especially the routes an RV will take. RV drivers want to take roads that will accommodate the height, width, and length of their rig for safety’s sake. Having an RV GPS takes the guesswork out of planning routes and reduces the stress of driving a rig on unfamiliar roads. A GPS warns drivers when there are curves and tunnels up ahead, the elevation and rise of the road, live weather updates, and more. It makes a great gift for a practical RV owner who loves planning ahead.

U.S. States Scratch-off Map Give your RV enthusiast a fun, visual way to track their travels. A map of the United States scratches off to reveal stunning photos of that specific state. If this particular map isn’t quite your friend or family member’s style, or you’re looking for one in a different size, If a scratch off map doesn’t feel right, there are also options for magnetic maps and sticker maps.

Instant Pot When space is limited in an RV, using kitchen appliances that pull double duty can be really handy. An Instant Pot has 7 different functions: pressure cooker, slow cooker, rice cooker, saut?/browning, steamer and warmer, and yogurt maker. There are 14 built-in program settings for common campground dishes like soup, chili, rice, and more. Plus, you can delay cooking or keep food warm, customizing it to your camping schedules. This is also a great idea for RV owners who don’t have a full kitchen — all they need is an outlet!

Portable Cornhole Game When waiting for dinner to finish or taking a break from more strenuous activities, pass a little time on the campground with a portable cornhole game set. This game comes with 2 collapsible boards and 8 bean bags. Lightweight and portable, the entire set comes in a carrying case to keep everything together. A great idea for RV owners who travel in groups or with grandkids.

Grilling Utensils Set Even if the RV owner in your life already has grilling utensils in their rig, we’re willing to bet that they’re extras that have taken from the kitchen in their home. They’ll love an upgrade with a gorgeous 18-piece grill set with things like a chef’s spatula, grill tongs, digital temperature fork, corn holders, skewers, and more. You can also buy a set with a durable aluminum carrying case, so the utensils can be stored safely until they’re ready to be used.

Packable Waterproof Hammock Give the old camping chairs a rest and relax in the comfort of a portable double hammock. Many of these hammocks can hold up to 720 lbs and are waterproof and windproof. Make sure to buy a hammock with anti-rupture carabiners that securely fasten your hammock to trees, and make sure it comes with tree straps. Hammocks can sometimes transform into a tarp or tent for your campsite if needed! When it’s time to leave, pack the fabric into the attached pocket to keep it all together.

A National Parks Pass A National Parks pass is a thoughtful gift for any RV owner who frequents national parks, national forests, or national wildlife refuges. These passes cover entrance fees or day use fees per vehicle. At just $80 for an annual pass (or $20 for an annual senior pass), this makes a great, affordable gift for RVers who love visiting our national parks.

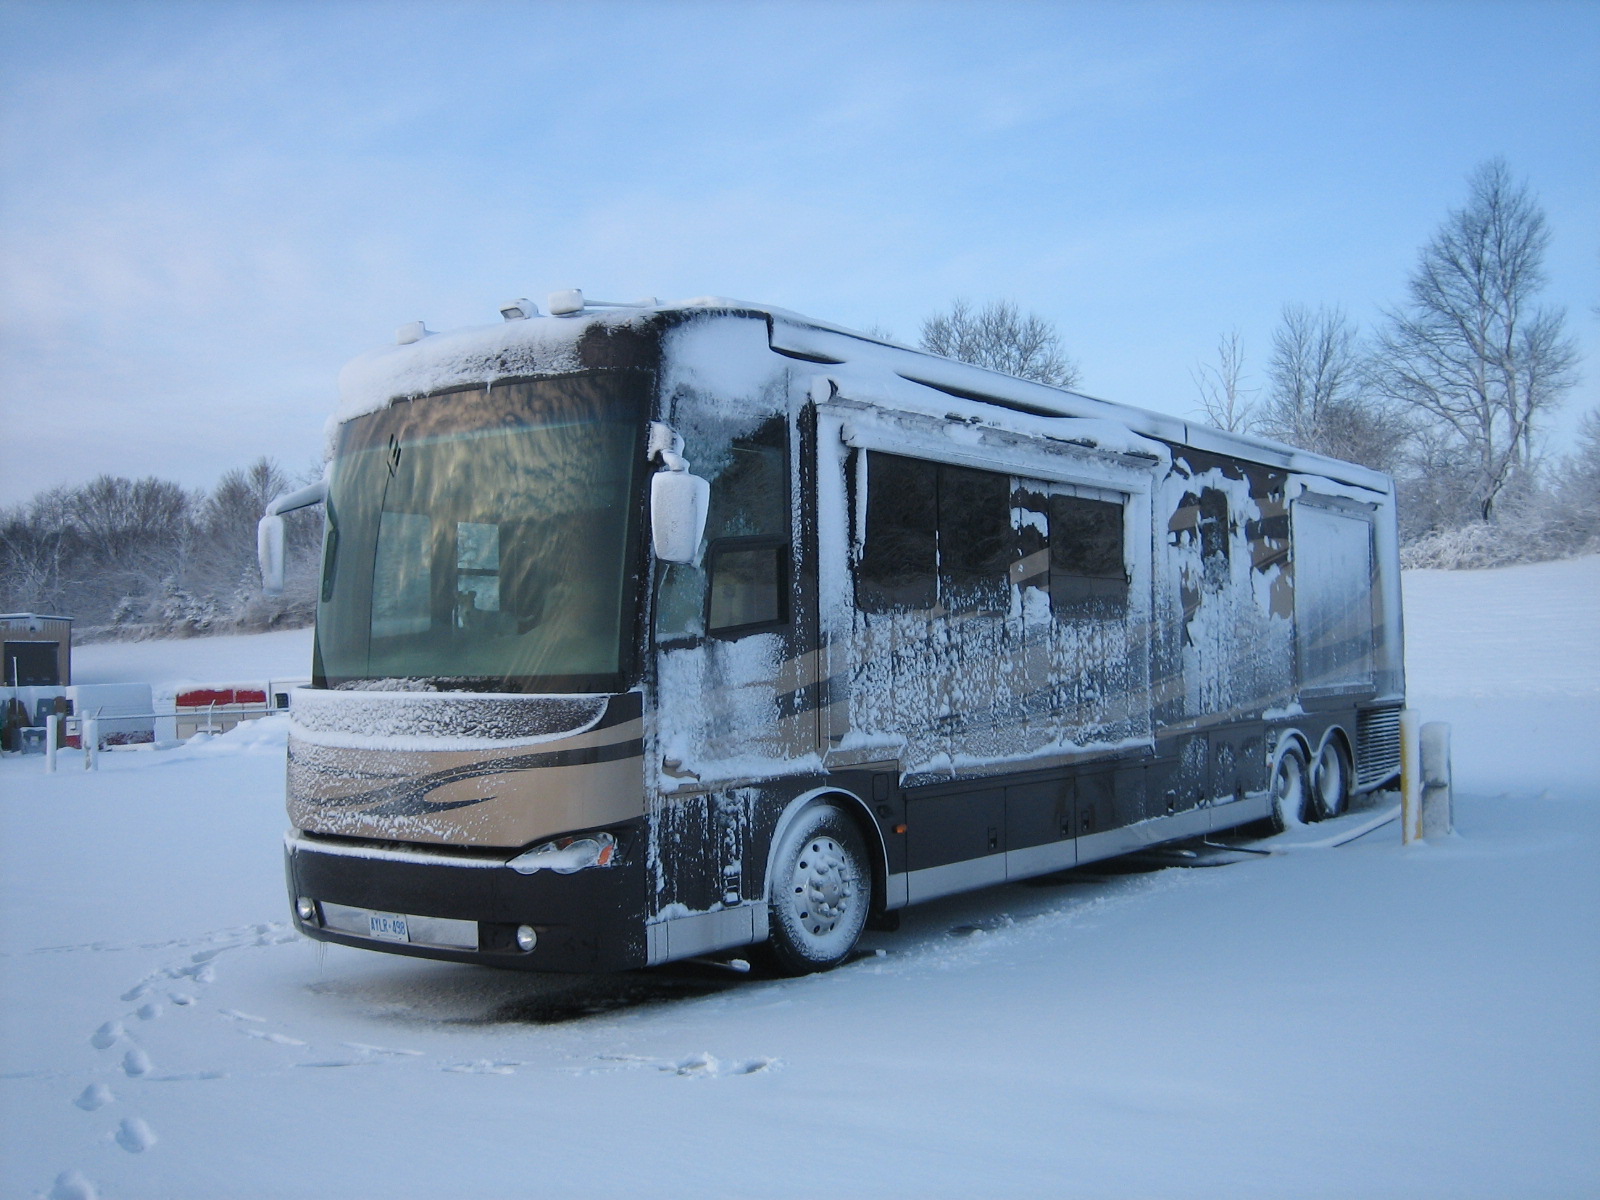
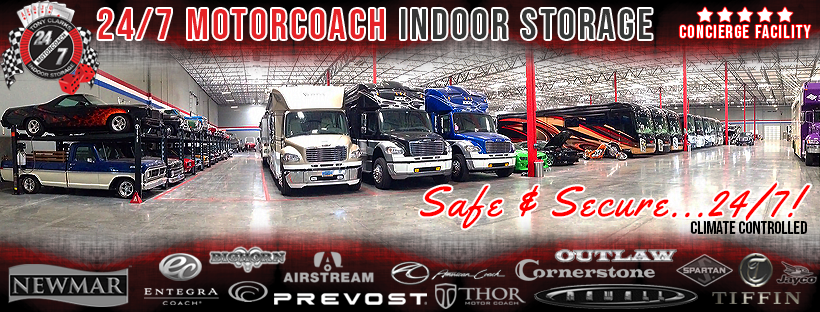
enter image description here While tasks involved winterizing an RV can be done by a knowledgeable RV owner, the best way to protect your RV is by taking your RV to 24/7 MotorCoach Service Center, where it can be professionally winterized and even stored indoor at our climate controlled concierge indoor storage facility, 24/7 Indoor Storage. enter image description here
RV WINTERIZATION SERVICE

BASIC RV WINTERIZATION PACKAGE: $150

  • DRAIN FRESH WATER TANK & WATER HEATER
  • BLOWOUT ALL WATER LINES WITH COMPRESSED AIR
  • FILL P-TRAP WITH ANTI-FREEZE

Call or Visit us Today! And schedule all of your RV Service and RV Maintenance needs with our RVIA/RVDA Professionally Trained Techs at:

24/7 MotorCoach Service Center 702-757-2471

3930 W. Windmill Lane #130-B Las Vegas Nevada 89139

Contact us Today for Your Free Quote

Whatever your needs, our professionally trained specialists are up to the task of repairing, renovating or reinventing your motorcoach. We service Las Vegas and all other surrounding areas. Contact us and see for yourself why so many coach owners count on 24/7 Motorcoach for all their service and maintenance needs.

We offer fast turnaround times, the most competitive prices in the industry and a level of customer service that you just won’t find anywhere else. Call us today at 702-757-2471

OUR ADDRESS

  • 3930 W. Windmill Lane #130-B
  • LAS VEGAS NEVADA 89139
  • Mon - Fri: 8AM - 5PM
  • 702-757-2471

Repair Garage License #: GAR000046449
Body Shop License #: BD0000046448